Email is one of the most popular and effective customer service channels. With CloudCX Inbox, you can add your email accounts to Inbox to provide customer service in the email channel.
Currently, CloudCX supports four types of email accounts:
POP3 account: Post Office Protocol 3 (POP3) is one of the most common email account types. You can connect your email account with POP3 and SMTP configurations.
IMAP account: Internet Message Access Protocol (IMAP) is one of the most common email account types. You can connect your email account with IMAP and SMTP configurations.
Office 365 account: Office 365 (also known as Microsoft 365) is a set of cloud-based applications and services provided by Microsoft, including Office, Exchange Online, and so on. A standalone Exchange Online email account is also supported. You can connect your email account with Office 365.
Gmail: Gmail is an email service provided by Google. You can connect your email account with Gmail.
Go to your CX system, and log in with the tenant admin account.
From the left navigation menu, go to Inbox > Channels > Email.
Add A POP3 & IMAP account
Note: The steps to add IMAP are the same as POP3.
Click on the “+” button and choose POP3 / IMAP from the dropdown list to add POP3 / IMAP account.
Enter your Email account information.
User Info
Email Address: Input the address of the email account that you want to add.
Username: It might be the part of your email address before the @ symbol, or your complete email address.
Note: If you are using a corporate Gmail account, add "recent:" before your user name to ensure normal communication. For example, recent:yourname@example.com
Password: Input the password of your email account.
Display name: Input the name you want your recipients to see. For example, CloudCX Customer Support.
Server Info
Incoming mail server (POP3): The incoming mail server information. Check with your ESP or mail administrator for the server address.
Outgoing mail server (SMTP): The outgoing mail server information. Check with your ESP or mail administrator for the server address.
Click on “Test POP3(Receive)”, “Test SMTP (Send)”, to verify your account information.
Note: Please check your email providers, some email providers require SMTP Authentication.
Click on “Save” to finish this addition. Your POP3 / IMAP account is added to CloudCX, the added account will be listed on the Inbox > Channels > Email. Now, CloudCX will be able to receive or send emails from or to the connected POP3 / IMAP account.
Add An Office 365 account
Click on the “+” button and choose Office 365 from the dropdown list to add Office 365 account.
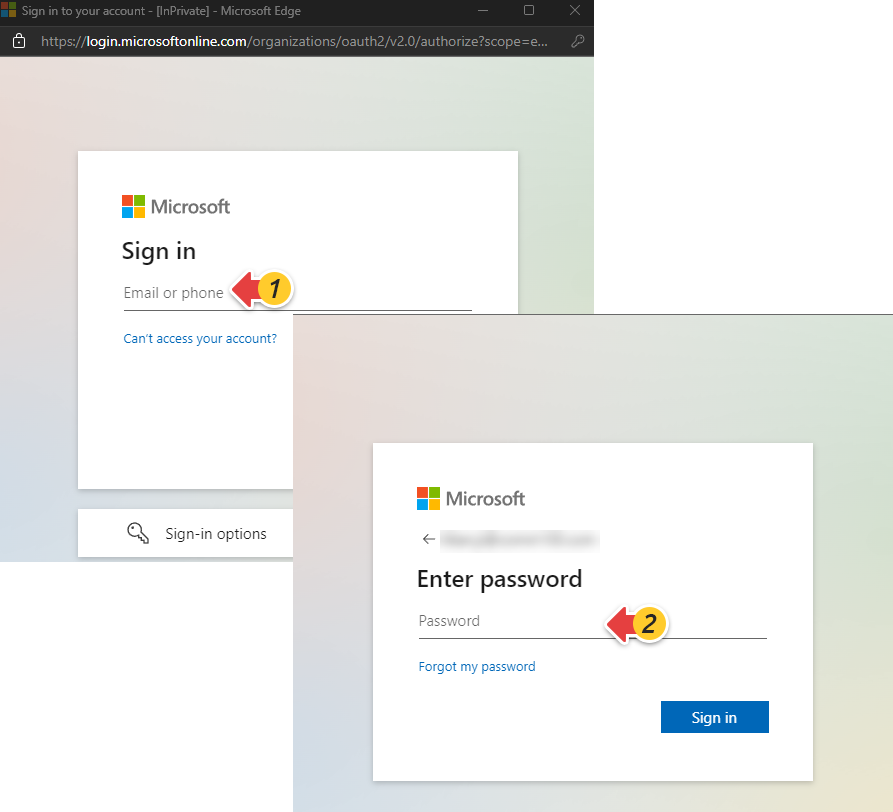
Enter your Microsoft account and password to sign in. A permission request window appears after you sign in.
3. In the Permission requested window, click on “Accept” to grant permissions to CloudCX, the Microsoft connect page will be closed automatically.
The added Office 365 account will be listed on the Inbox > Channels > Email. Now, CloudCX will be able to receive or send emails from or to the added Office 365 account.
If users receive this warning message, please contact your service provider.
Add A Gmail account
Click on the “+” button and select Gmail from the dropdown list to add Gmail account.
Select an account to connect CloudCX.
In the Permission requested window, select the permission and click on “Continue” to grant permissions to CloudCX, the Google connect page will be closed automatically.
The added Gmail account will be listed on the Inbox > Channels > Email. Now, CloudCX will be able to receive or send emails from or to the added Gmail account.
Note:
When you have multiple accounts linked to your Gmail email address and set up a default send email address, the system will follow your Gmail settings.
When you change the default sending email address, please click on the “Refresh” icon on the Inbox > Channels > Email to sync your settings, otherwise it may not work.
Note: The sending limits, such as the number of emails sent per day and the number of recipients per email, are subjected to your SMTP server.
And to use Office 365 Email, you need to add the Office 365 Email to an administrator email.
Manage Email Accounts in Inbox
Enable / Disable: Turn on / off the “Enable” button to enable / disable the connected Email account. If you disable an Email account, CloudCX will no longer be able to receive or send emails from or to the account. If you enable the account again, CloudCX will continue to receive or send emails from or to the account.
Edit: Click on the “Edit” icon to open the edition window for editing the connected Email account.
Delete: Click on the “Delete” icon to open a confirmation window for deleting the connected Email account. Click on “Delete” button to delete the account, or click on “Cancel” to cancel the deletion.
Configure Email Accounts in Inbox
CloudCX Inbox supports multiple email accounts. When an agent reply to a visitor email, the Default email account is used as the scent email address.
Go to your CX system, and login with the admin account.
From the left navigation menu, go to Inbox > Channels > Email.
Select an email account from the drop-down list as for Default email account.
You can choose to turn on the Remove “Powered By xxx” in emails button, the text “Powered By xxx” will not be displayed in the replied email.
If users receive this warning message, please contact your service provider.


