...
Step by Step Instructions
...
(1)Log in to your Cloudfon CX Control Panel.
...
(2)From the left navigation menu, go to Inbox > Channels > Email.
...
POP3&IMAP account
Note: The steps to add IMAP are the same as POP3.
...
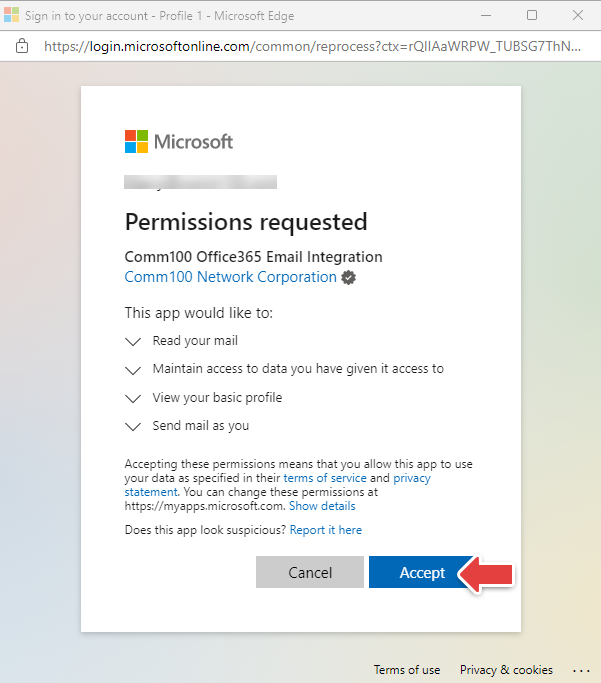
(3)In the Permission requested window, click Accept to grant permissions to CloudFon CX.Your Office 365 account is added to CloudFon CX after permissions are granted successfully. The added account appears in the email account list.
(4)Your Office 365 account is added to CloudFon CX after permissions are granted successfully. The added account appears in the email account list.
...
(2) In the Pop-Up, choose an account to sign in with.
...
(3)Enable your account.
...
Note: The sending limits, such as the number of emails sent per day and the number of recipients per email, are subjected to your SMTP server.
And to use office365 mail, you need to add the office365 mail to an administrator email.
...
Cloudfon CX Inbox supports multiple email accounts. When you respond to tickets, the Default email account is used as the email address.
...
(1)Log in to your Cloudfon Contact Center Control Panel.
...
(2)From the left navigation menu, go to Inbox > Channels > Email.
...
(3)Select an email account from the drop-down list Default email account.
...
(4)Turn on Remove "Powered By" in emails, text "Powered By" will not be displayed in the email reply.
...
